Last week we were here for a few wonderful days:

and I got behind on my dress for the Fashionable Stitch sew along. Over the weekend, I was able to catch up. Since the topic for today is linings, I thought I'd share my lining strategy for this dress. The wrap front and cap sleeves complicate my usual method, but it's still possible to have a nice neat lining.
I bought this fabric planning an unlined summer dress. But as I worked through this project, I decided that this fabric would hang better, stick to me less and just look nicer with a lining. The fabric is a sort of flocked cotton, kind of like a swiss dot, but more like a broadcloth, so it doesn't really glide off the body. I have been following this ingenius lining method for my sleeveless dresses for a while now, but I had to tweak it a little for the wrap bodice and the cap sleeves.
The fabric is a nice navy, but very difficult to photograph. I've had to overexpose things to show the details. I apologize for the poor photos, but I think you can get the construction idea. The lining fabric is cotton voile, which also makes it tricky to see difference. Remember that the main fabric has the little raised dots and the lining is smooth.

Start with a fashion bodice assembled at the shoulders but open in front and at the side seams and a lining/facing bodice also assembled at the shoulders and open in front and at the sides. The sleeves have been attached flat for this method. (Note that I created one piece out the the front and back yoke.) I attached the facings to lining pieces cut from the main pattern piece, using cotton muslin for interfacing. You could skip the facings and just have a lining, but the facings do add some structure and longevity

The first step is to pin the bodice to the lining/facing at the neck with right sides together. There are lots of pins here because even though I stay stitched the opening, I found I needed to ease the bodice on to the facing to prevent stretching. Stitch.

Press flat to set the seams, then grade the seam allowances. This means trim the seam allowances to different widths to reduce bulk. Trim the seam closest to the outside of the dress the longest, because this will be the most visible. Then press the seam allowances toward the facing and understitch the facing to the seam allowances close to the stitching line.

Clip into the neck curves so it will lay flat and clip the seam allowances where they meet other seams to reduce bulk. Turn and press the neck edge.

Here is the finished neck edge with understitching.

The cap sleeves are so little, I figured I could treat this as if it were a sleeveless dress. Since the pattern called for a sleeve facing anyway, this really worked well. Next, pin one cap sleeve to the facing with right sides together and stitch just the hem of the sleeve, not the underarm seam. Press flat on both sides and trim seam allowances.

Now for the magic part - and no matter how many times I do this, a little part of me is never sure it will actually work - you pull the front through the shoulders and turn the whole thing inside out. If you're unsure whether you have it assembled correctly, pin it all together first and turn it to check.

Press the seam allowances toward the facing. I used a sleeve roll to get inside the loop. Understitch the sleeve as well, start from the front sleeve and stitch a little, then readjust your fabric and stitch some more. After you reach the middle, start again from the back to finish understitching.

Press the sleeve flat and repeat for the other sleeve.


Nicely finished neck and sleeves - inside and out! I love this.

The results of this method are really quite professional.

To finish, sew the sides seams of the bodice, cap sleeve and lining in one swoop.Pin right sides together, taking care to line up all the under arm seam lines. Stitch and press flat on both sides.

Again, I like to trim the seam allowances where they meet to reduce bulk.
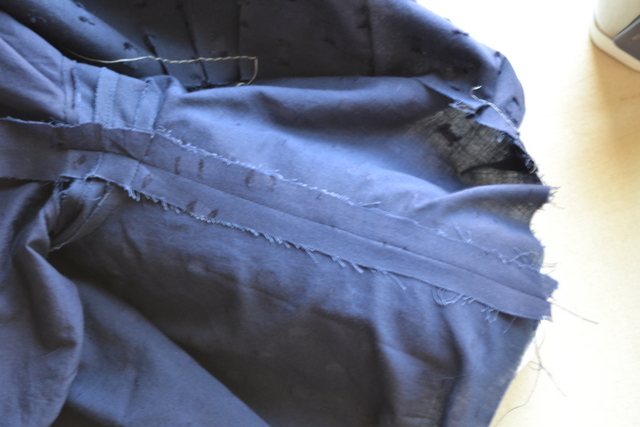
Press this seam open on both sides, then press the armpit flat. Bodice finished!
Now the dress is ready for the skirt. Overlap the front bodice, per the pattern instructions, then attach the skirt to the bodice unit, leaving the left side open for the zipper. Then attach the skirt lining by sandwhiching the bodice inbetween the skirt and the skirt lining and stitching the lining to the waist seam allowance close to the seam line. This will encase the raw edges. Leave the lining open a few inches near the left side to attach to the zipper later.
What do you think? Do you have other lining tricks to share?
No comments:
Post a Comment