Showing posts with label baby clothes. Show all posts

Friday, May 10, 2013

urban babies wear black

Earlier this week, I was staring at a few scraps black rayon challis left from a black maxi dress I made for myself. You know the conversation: can I really use these for anything or should I toss them? Often I use my scraps for K, but black? Then I remembered that actually I quite like her in black.  

Then I thought it would be awfully ridiculous if she had a black maxi dress too.

And I remembered this silly gag book. And I thought about how even more hilarious it would be if I photographed her in the dress doing the stuff in the book.

So here is my urban baby wearing black and drinking a latte.

I don't have to tell you it's not really coffee, right? It's apple juice. Organic, obviously, because we're urban.

And here's my urban baby on the way to the playground.

(OK, the playground isn't actually in the book, but urban babies do in fact go to the playground every day.)

And here she is taking a taxi at the end of a busy day.

(OK, we actually walked home, because that's what urban babies do, but I knew at this partcular time of day, ie prayer time for the mosque around the corner, there would be cabs parked outside our house and I couldn't resist staging it.)

So is this the most ridiculously impractical little thing you've ever seen or what? But otherwise the fabric would have gone in the trash and the popover pattern is so very easy, I thought it was all worth a little fun. And in her hair is a matching hair bow, because everything we do now has to have a matching hair bow.

Thursday, December 1, 2011

little comfort clothes

There was so much sewing in the late summer and early fall that I actually forgot to buy her a winter wardrobe. When we started to feel a chill in the air, I realized I had little to nothing in the way of warm play clothes. Kids’ clothes always seem to sell out by early fall, so I had no choice but to sew some. I’ve had the Class Picnic pattern since it was released, but I was already starting on summer things by the time it arrived and never got to it. I looked at it again and thought of some flannels in my stash from last year.

This may be my favorite Oliver + S pattern yet. It is simple, yet elegant. It has subtle well-designed details and I think it would look lovely made up in nearly any fabric. I love how the elastic casings at the shoulders not only make this top easy to wear, but creates a look similar to a puffed sleeve. That slight puffiness looks positively darling on a little shoulder, but isn’t fussy at all. It’s a thoroughly modern design, but rooted in a traditional look.


The Picnic Blouse is only slightly more complicated to construct as the Ice Cream dress and so could easily be made over and over. There is so much room to add you own touch to this design. It could be lengthened into a dress; the sleeves could be lengthened or shortened. I’m already picturing this in white linen for the summer with tiny details out of some Liberty scraps.

You can see it’s perfect for playtime. It’s loose and easy to move in. We like the Picnic Blouses paired with skinny jeans or Ponte leggings. The three quarter sleeves are great for babies. Long sleeves tend to get wet or dirty. I hemmed them with large stitches so I could let them out if need be. This flannel is just some cheap stuff I bought on sale at Joann last year. For the 18month size, I used a mere 25” of fabric so this top cost probably less than $4.00.


The only reason I hesitate to call it my #1 fav, is that finishing is not as easy as for the Ice Cream dress. These were quick easy playclothes, so for once I simply pinked the seams. After all, flannel doesn’t ravel much. Normally I’m absolutely nutty about seam finishes. My French seam favorites might still work here in a very lightweight fabric, but the yoke facing creates an extra layer in the seam which might make them a little bulky. I think for a fine finish on a slightly heavier fabric – wouldn’t this be so cute and cozy in corduroy? – a very lightweight seam binding might be in order. I will work on finishes when I sew this for spring - and I will be sewing it for the spring!

This is a tough time of year to snap photos. The sunlight hours are so short and so many days are gray. If we have just one thing to do in the morning hours, I’ve lost the whole day as far as photos are concerned. There are only three quiet mornings when boys are at school, so this is the best I could do this week. I made two of these, so there will be more next week. Don’t you love the bottom lip?

Tuesday, November 8, 2011

en francąis!*


I’ve been waiting so long to share this project, I hope you’ll forgive me the gratuitous photos. In the spring, I ordered a few very special patterns all the way from France. They were unlike any patterns I've seen, particularly Dorotheé. The charming vintage sweetness of the teeny poofy sleeves, the gathers, the inverted pleat and the very short hem seemed to me quite special indeed.


I am completely smitten with Citronille. Such lovely designs! This one was beautifully drafted and came together easily. I was a little confused about where to place the gathers exactly, but worked it out. I like that it has a generous placket with just two little buttons. It goes easily over baby's head without buttoning all the way down the back. I plan to use this construction in the future. The instructions are in French, but if you’re an experienced seamstress, you can probably work it out from the diagrams alone.


I had a few years of French in college and I had to be able to read a fair bit of French for research purposes in grad school. That experience was enough to get me through the pattern instructions, though I still had to look up quite a few words. After all, when you’re researching early 20th century literature, sewing jargon isn’t on the vocab list. Industry specific terms are usually hard to find in your standard dictionary, and I had to rely on my sewing experience and make a few guesses.


Figuring this out is fun for me. I like languages because I like learning about other people and their ways of doing things.  One of the things I always tried to get my students to understand – way back in that other life when I was a language teacher – is that languages are inextricably bound up in their culture. You don’t get one without the other. Translating one language to another is not like balancing a math equation. It isn’t just a question of substituting our English word for the equivalent word in French. Sometimes there is no equivalent and sometimes the same word has a different cultural meaning. Sewing in French reminded me just a little of my years in Europe. Things were in some ways the same, but also very diffent.

Back to the dress. The only thing I changed was to self line the bodice. For help, I referred to the Puppet Show dress pattern. I hand stitched it into place. I used French seams and bias bound the armscye seams. Gosh, I should have shown you the inside! I hand stitched the tiny bracelet sleeve cuffs and the hem. I don’t think I’ve ever accomplished such a lovely dress in my life.


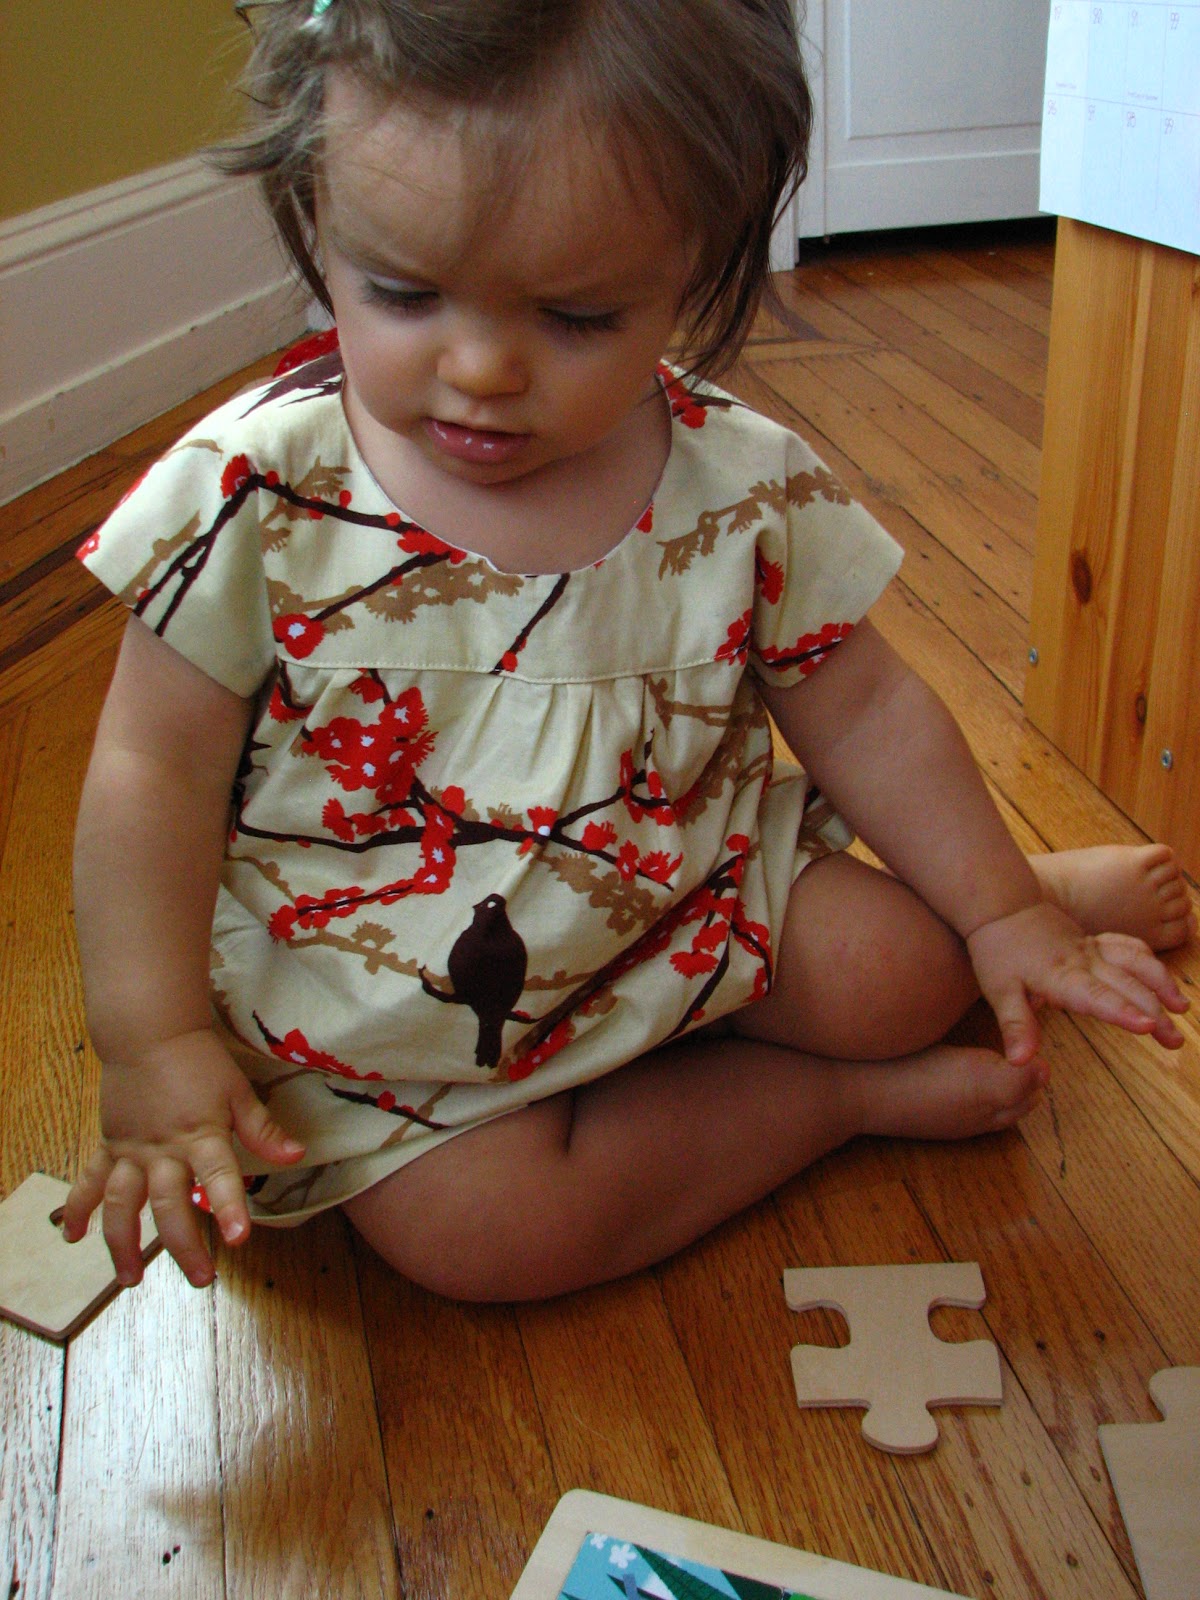
The fabric is cotton lawn by Moda from the Regent Street collection. It is as beautiful as the pattern. I made a very deep hem to help the fabric drape nicely. Shell buttons came from the LYS. They are rather simple have a slightly imperfect handmade charm.  These pictures are from a photo shoot with George Aubrey Photography for her one year portrait.

Have you tried foreign language patterns? French? Japanese?


*At my eldest’s preschool graduation, the kids sang the Yellow Submarine in French. After each child’s solo, the music teacher sang, “all together now, en francais!” and the group sang the chorus. There were 30 kids, so we heard the song over and over. And over. Consequently, “dans une sous-marin jaune” was stuck in my head for at least a week right around the time the patterns came in the mail.

Wednesday, November 2, 2011

halloween


 This was the first year my boys have been interested in Halloween. They were scared of costumes in the past or something and who really wants to force a little kid to eat tons of candy? But last year, dad took them trick or treating and they had so very much fun that they finally realized that Halloween is (duh!) pretty cool. This year, I made sure they got costume requests in early. 


Though I was exhausted after K’s birthday bash, I couldn’t let that stop my boys from properly observing one of the high holidays of childhood. While I left the actual sewing to the last minute, I had a plan for the costumes and had sourced almost all of the materials already. Putting them together wasn’t hard at all. I highly recommend this superhero cape pattern and the free matching downloadable applique patterns.


It was surprisingly fun sewing for the boys. I don’t get to do it much. I suppose that sounds more like a personal choice, but it’s just not practical. They are also so hard on their clothes! Why spend the time making khaki cargo pants that I can make neither as nicely as Lands End or as affordably when they’ll just tear out the knees in no time? But costumes I can do far better than most junk out there and the boys loved them! My oldest kept saying “oh, thank you, Mom!” and “I love it, Mom!” and “you do really nice work, Mom!” Can you imagine? Melt. 


Then I volunteered to go read a spooky story to my son’s kindergarten class and suddenly Catherine needed a costume too! There was some green sateen in the queue for a play dress and some yellow wool felt left from another project.  I made a Music Box Jumper on Saturday, finishing everything with the machine to save time. It is a play dress, after all, so it doesn’t need any fine finishes. 


This pattern will clearly become a winter wardrobe staple. There are just four simple pattern pieces (plus flaps) so you can trace and cut quickly. The construction is traditional, so you don’t have to pause to figure out any unfamiliar techniques. It would be easy to add pockets and I would like to experiment with fewer buttons at the back. There are a lot of possibilities – piping would be nice, as would some ribbon or embroidery. In corduroy or wool, it would add nice warmth to winter layers. In velveteen or voile it could even look fancy. And of course it looks great as is, but I’m a sucker for an inverted pleat.

 Sunday, I tackled the costume part. At first, I planned asort of petal necklace but then thought it would be nicer if the petals framed her sunny face. I considered wire or interfacing and then copied this very helpfulproject on the purl bee, opting for a hood instead of a headband. I used McCalls 4478 for the bonnet in scraps from the jumper and lined it with cotton flannel for warmth. Then I topstitched two rows of petals to it by machine. It was a little fiddly, but it ultimately saved me time. I tacked the petals together halfway up to help them stand up. 


I’m pretty pleased with the result, but it doesn’t take much to make this cutie shine!

 Hope you had a happy Halloween too!

Monday, October 10, 2011

birthday preview & a playdate tip


Though I'm still waiting to find the perfect buttons, I thought I'd post a quick preview of K's 1st birthday party dress, so I can share with you a clever (I think) way to finish the dress at the yoke. If you've made this one before, you know that you can't use the traditional seam finishes where the yoke joins the dress body. The yoke is completely finished and then topstitched to the dress. Cleverly, this makes it easier to get a nice round seam on the yoke, but it leaves the inside seam allowance raw. But here is the inside of my Playdate Dress


I cut a wide piece of contrast double fold bias - 2" to 2 1/2" would work - and bound the raw neck edge before attaching the yoke. I basted the bias to the right side, flipped it round and basted it again to hold it in place. I placed the yoke using lots of pins and a seam gauge to get an even 1/8" all the way around and topstitched it into place, being careful to catch the bias as well. Then, I went back and ripped out all the basting stitches.


The bias edge is loose and looks just like flat piping. I wish I had taken pictures as I went, but was running behind schedule with this one. If it's unclear, I'm happy to try and explain better. What do you think?

Posted by Picasa

Wednesday, October 5, 2011

autumn leaves cardigan

My very favorite day of the year is that first day I can comfortably slip on jeans and a sweater. It feels so good after the long sticky uncomfortable summer to feel that promising chill to the air. It feels good to wear real clothes again. It feels good to be outside again. It feels good to again haunt the city’s parks and playgrounds and kick some leaves. I find this time of year relaxing, invigorating, and promising.  Warm and fuzzy thoughts fill my head of baking pies and roasting turkeys, apple picking and Sunday rides. And outside, in that crisp, sunny fresh air, I look forward to the cold winter at the end of the holidays when I can slow down, hole myself up inside with a pair of needles and begin the knitting cycle all over again.

Yesterday, baby girl and I both stepped out in hand knitted sweaters to celebrate the first sweater day. I began this one for her during our road trip to my parents’ house in Georgia. Ever since I discovered that I can in fact knit in the car without feeling sick, I have looked at road trips in a new light. Suddenly, I don’t care about two days with all five of us smushed into the Volvo. All I can see is 14 full hours of knitting. So I made sure I had knitting ready. I completed the leafy yoke of the sweater before we left and worked the ribbing on the way down. While down there, I started the hem of a second sweater so I could do the stockinette in the car on the way home. Presto – most of my fall knitting done. However, lots of things went haywire in the second half of the summer and I only put the finishing touches on this sweater last week when I felt the chill in the air approaching.

The pattern is from a Nashua Handknits booklet called Bloom, which I read about on the Purl Bee. I found the pattern was indeed reliable. I did have a hard time finding the right yarn, so it’s been on the back burner since last year. The sizing is awkward too. I imagine it’s due to the math involved in the cabled yoke stitch pattern, but they only offer sizes 3 months, 6 months and 24 months. Making some guesses based on the size of my sons at age 1, I made the 24 month size with a slightly smaller gauge. However, my largest child at birth, 9lbs 6oz to be exact, is turning into my smallest and is swimming in the sweater. Maybe I’ll try the dryer.

The yarn is Berreco Vintage. I don’t normally use acrylic, but this was a nice feeling blend and it is useful to have hard wearing yarn for children’s things. It was easy to work with and nice to handle. I suppose the only downside is that it’s slightly fuzzy after being worked and doesn’t have the crisp stitch definition other yarns might. Still, the color was spot on and while it isn’t the nicest yarn I ever worked with, I don’t regret it.

Happy Fall!

Monday, September 19, 2011

Back to School, big heads, a printable and a giveaway!

My oldest child started kindergarten last week and my other son started preschool. It was a big week and I didn't have much time for blogging.  This was K's honorary back to school dress. It was just right for seeing big brothers off to school! (And if I'm honest, it was the only clean and presentable thing I could pull out of her closet that morning.)

I’ve been meaning to post my ice cream dress alteration for some time, but have been distracted with some other sewing, as well as planning my Fall Palette Challenge. (The dress you see in my new fall banner is coming soon, I promise, and it’s worth waiting for!)  The Oliver + S Ice Cream Dress has become one of my wardrobe staples. It has a generous fit, which helps it last a long time – except that babies and toddlers usually have disproportionately large heads. Most babies don’t like things pulled over their heads either, so it becomes a struggle.  The neck is already wide, so that’s not a good place to adjust. Instead, I added a deeper opening in the back using a placket.


Below are photos as well as – wait for it! – a pdf you can print with instructions and a tiny pattern for the placket piece!  And, because I made three of these for the sake of pictures, I will give the other two dresses – one size 18 months and one size 3T – to two lucky readers. Use them for your own children or as gifts. They are made from the highly desirable Joel Dewberry Aviary collection in a perfectly autumn colorway.  To win the dresses, become a follower of my blog with the Google widget to the right and leave a comment below that includes your email address and which size you'd prefer. I’ll choose a winner at random on Friday and announce it. Then you can email me your mailing address and I’ll pop it in the post. 

It's not a difficult process, so I'll just let you read the instructions on the pdf, but I thought the pictures would be helpful. Basically, you cut a placket shape out of a scrap of fabric, attach it to the dress back, stitch around the opening, cut it open and flip the whole thing around to the inside. Then topstitch it carefully and construct the dress pretty much as normal except that you'll have to separate sides on the back. This actually makes it a little easier to assemble too.
 I've seen one or two other solutions out there for this problem, so I know I'm not the only one who has to make a large head adjustment to the pattern. You could also make a keyhole opening by binding a slit with bias tape. It's really up to you, but I hope you find my solution useful.


This is Kitty's 18month sized dress. The other 18month one looks exactly the same - it's a short dress for ease of crawling and exploring. The 3T dress has pockets and the contrasting band at the hem. The contrast is a Kaffe Fasset shot cotton in an orange-y red that matches the flowers. These wash easily and are great play dresses. So follow, comment and check back Friday to see who won!

And because I have your attention, here's a gratuitous shot of my first born baby all grown up in his summer uniform after his very first day at Kindergarten!


[updated to add]

 Thanks for all your comments! I'm glad to hear you find my technique useful. Here's a picture of the size 3T brown bird dress. There's still time to leave your name to win back to school dresses! (Don't forget to follow publicly with Google Friend Connect so I can see you. )

Friday, September 2, 2011

popover for one last summer playdate

This is the last summer dress for Kitty and the last of my yellow and pink projects. She was so excited by the yellow fabric while I was stitching my Sorbetto top, that I simply had to make something for her and I knew the Popover Sundress would be perfect. When I finished and showed her the dress, she positively squealed and snatched it.

I made one change this time around. Cute as those little bows on the shoulder are, they are a pain to do up on a squirmy, wriggly, and generally impatient 10 month old. So I used the continuous loop method to make the straps, as if I were finishing a regular armscye. Now it really is a dress to just popover. I think it streamlined the look a little bit too.

The best pictures I could get of this dress were of the back of it as she crawled away. It's a good thing I made the shorter length again. I'll be sticking to this length through the fall and winter. Anything longer, and she just gets all tangled up.This is the time of life to be on the move.

 I managed to finish one special project today and hope to photograph it over the holiday weekend. I also hope to carve out time to finally start on one of the lovely patterns from France. I will also be planning my Fall Palette Challenge. What will you be doing with the last weekend of your summer? 

Tuesday, August 23, 2011

time to chase the ice cream truck

Work on my family room has ground to a halt and the house is in utter chaos. There are boxes everywhere, furniture stacked in inconvenient places and my desk shoved into a tiny second floor landing.  Worse, it doesn't look like work will resume any time soon. I'm not entirely sure why, but all this chaos has invaded my sewing area too and I'm still not able to get much done. So I thought I'd share another Ice Cream Dress I made earlier in the summer that has become an everyday favorite. The fabric here is a cotton Swiss dot I picked up on sale at Joann last summer. It's very lightweight and soft.

As you can see, this dress is perfect for playtime with plenty of room to crawl, roll, pull up, topple, chase brothers, investigate and get into trouble as babies of 10 months are wont to do.

How much do you love the tiny toes?

I cut baby Ice Cream dresses at the length for view A without the bottom band. This is more like a tunic, but is just right for an active baby. I pair them with shorts, bloomers or in this case, just her cloth diaper that matches perfectly.

I also picked this fabric because the darker pink and little bits of olive green seemed like they would take un into early fall with layers. An easy and useful wardrobe staple!

Monday, August 8, 2011

Summer Habitat


A special girl in my life recently had her first birthday. Since I know her mama appreciates handmade things, I decided to whip up a fun little outfit that she could wear right now in the hottest and stickiest part of the year. But while Miss V is all cuteness and fun, she’s not really in to the pink frills like my Kitty. She has a sophisticated modern taste and her wardrobe reflects this. To attain the hip aesthetic needed here, I again turned to Habitat by Philly designer Jay McCarroll. 


As a rule, I don’t choose a very bold or large prints for baby clothes. But sometimes, an unexpected large scale can be interesting. And in small does, the effect can be striking. The Oliver andS Ruffled Halter is a canvas suitable for something larger in scale. The large ruffles are cut on the bias, which tempers the boldness of the rich fabric. The abstract nature of the print "drop cloth" makes the large scale more palatable on a small child.  Mostly, though, it’s the big personality of this little lady that makes the whole thing work.


Like all Oliver and S patterns, this one is clever and clear. Although it’s a free pattern, it lacks none of their trademark attention to detail. I made some very small changes. For one, I hemmed the edges of the ruffles using my narrow hem foot, rather than let them fray as the pattern suggests. Also, I used a solid cotton voile for the base layer of the top. It’s hot and sticky here and since this fabric is just a little thicker and stiffer than I would normally put on a small child, I wanted to reduce the overall bulk. The pattern came together quickly and easily. The construction is unusual, so don't adlib the instructions. With French seams at the sides, the entire thing is neatly finished inside and out. 


I paired the ruffled halter with the Puppet Show shorts in a natural linen from my stash. The linen picks up a minor color in the drop cloth print tones down the overall boldness of the outfit. This combination is perfect for a new toddler who still spends time crawling. Dresses – cute as they are – just get in the way right now. This pairing accommodates her activity, but doesn’t sacrifice in cuteness or girly charm. Also, I think she’ll be able to wear it under a little cardigan once the weather cools.


I’m pleased to report that the gift was a huge hit with both the birthday girl and her mama. I was very happy to receive these pictures demonstrating how perfectly this ensemble suits Miss V!  It’s such a great feeling when a project comes together like this.

photos (and model) by Amanda Hall Studios